Extra Features
The Dashboard is organized by the most common
workflows used to manage your business. For
example, the Transactions' section includes
everything you need to manage the flow of money
in and out of your account.
In many cases, you can use the Dashboard to
perform specific actions, such as refunding a
payment or canceling a subscription, without
needing to use the API—making the Dashboard a
useful tool for running your business.
Dashboard
The Abhipay Dashboard is a feature-rich user
interface for you to operate and configure your
Abhipay account. You can use it to manage
payments and refunds, respond to dispute,
monitor your integration, and more.
Home provides useful at-a-glance information
about the activity on your account. A wide range
of analytics and real-time charts provide
insight into the performance of your business.
Home also shows recent activity that may require
you to take action, such as unanswered disputes
or identity verifications.

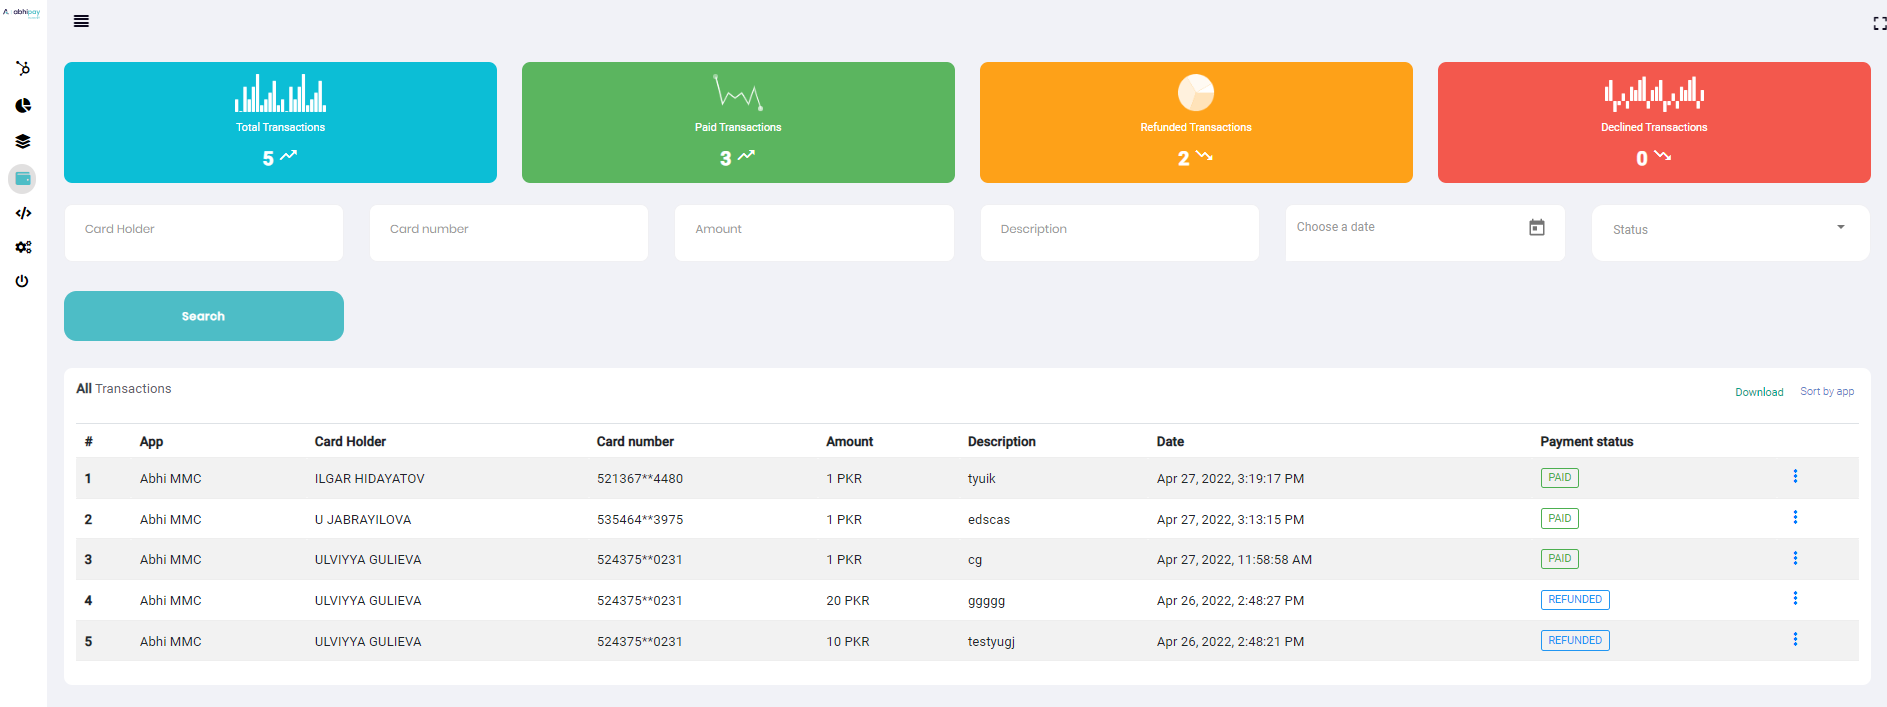
Transactions
Transactions
section includes everything you need to manage
the flow of money in and out of your account.
You can use the transactions to perform specific
actions, such as refunding a payment or
canceling a subscription, without needing to use
the API.

Creating reports and searches
All of your transactional data can be filtered
and exported as reports in CSV format. You can
also download the report. The Dashboard search
can be used to find specific information using
search terms and operators, find a specific
payment using the customer’s email address or
the last four digits of their card number to
narrow down the number of results.
Transactions status
| Parameter |
Description |
CREATED |
Indicates that the operation has
been created.
|
APPROVED |
Successful payment. |
CANCELED |
After canceled payment, the
forwarding address
|
DECLINED |
The operation was refused. |
REFUNDED |
The funds were returned. |
PREAUTH_APPROVED |
Confirmation of pre-authorization is
reported.
|
EXPIRED |
Indicates that the payment page has
expired.
|
REVERSE |
Reverse payment has been made. |
PARTIAL_REFUND |
A partial reversal operation
occurred.
|
SETTLED |
The funds were transferred from the
Wallet to the bank account.
|
PAID |
Payment was successful and added to
the Wallet.
|
Refund
You can refund charges made to your account,
either in whole or in part. Refunds use your
available Abhipay balance—this doesn’t include
any pending balance. If your available balance
doesn’t cover the amount of the refund, Abhipay
debits the remaining amount from your bank
account.
*If Abhipay can’t debit the remaining amount
from your bank account, your refunds may go into
a pending status until you add funds to your
Abhipay balance. You can view a list of all your
pending refunds in the Dashboard. If the
original charge underwent currency conversion,
the refunded amount converts back using the same
process. There are no fees to refund a charge,
but the fees from the original charge aren’t
returned.
Refunds can be issued via the
API
or the
Dashboard
and are processed immediately. Once issued, a
refund cannot be canceled.
Using the Dashboard
To refund a payment via the Dashboard:
-
Find the payment to be refunded in the
payments overview page
Transactions.
-
Click the button
Refund to the
right of the charge.
-
By default, you will issue a full refund.
For a partial refund, enter a different
amount to be refunded.
- Click
Refund.
Online Invoicing
With Abhipay, you can
send invoices online
to your customers through the click of a button
even if you don’t have a website. Accept instant
payments from your customers via credit or debit
card with our online invoicing solution.
This guide describes how to create an invoice
and collect payment. You can also use them as a
tool to collect payment. Businesses that aren’t
subscription based but still need to send
invoices to their customers commonly use one-off
invoices. For example, a consulting business
might send invoices for the time and resources
that each consultation uses.

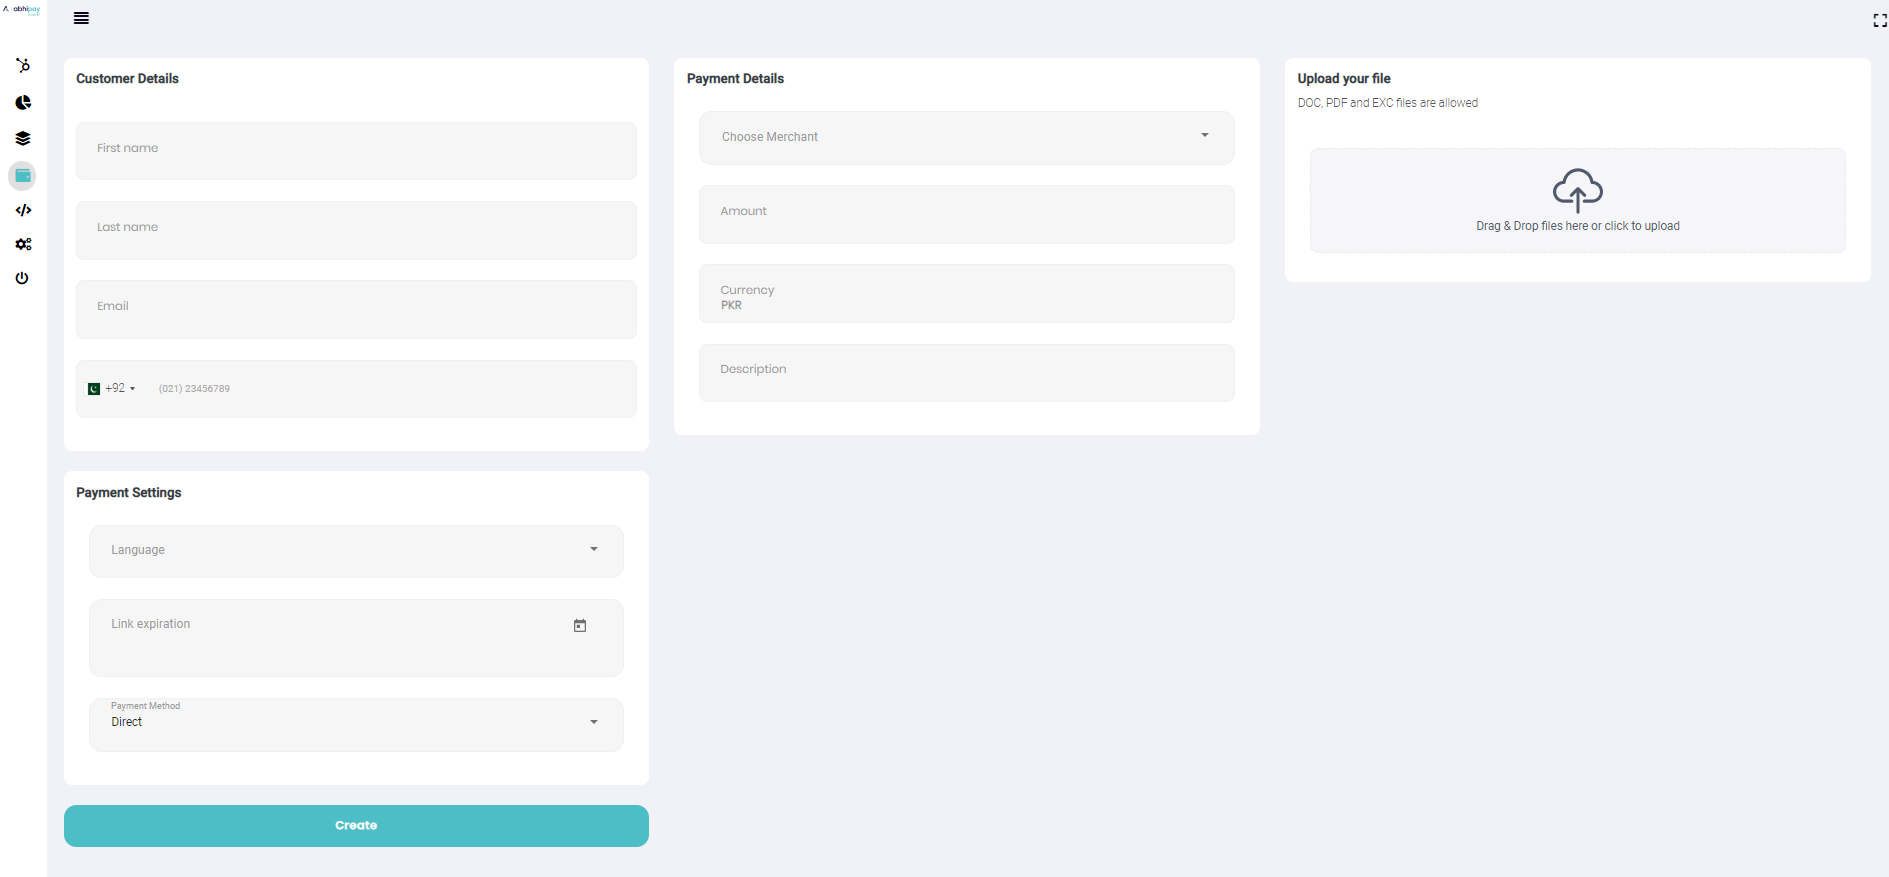
To create an invoice in the Abhipay Dashboard:
-
Navigate to the
Create an invoice
page.
-
Fill out the
Customer details, Payment details, and Payment settings fields
and click Save.
-
Verify the email address, but you can modify
it if you want to use a test email address.
-
Navigate to the
Invoices
page and click
Send Invoice.

Customer notification via SMS:

Customer notification via Email:

The Abhipay Dashboard is the most common way to
create one-off invoices, but you can automate
this process if you integrate with the API.
Recurring Payments
Easily manage the entire customer lifecycle from
accepting recurring payments to managing
customer subscriptions.


